zdroj: http://www.geeklk.com/2014/03/pfsense-configuring-windows-active-directory-authentication/
pfSense, one of the most powerful open-source firewall router (software based) which is completely based on FreeBSD OS family. Now you may assume, that you will need to know about terminal commands to control and manage this. Well, part of it is true as you will need to know about commands for any advancing purpose but not to install or manage. Because, pfSense itself is a web UI (user interface) where you can manage and advance your needs accordingly (even-though certain things require command knowledge). Installation of pfSense is done through few command line options but it is somewhat similar to installing a GUI software where you will need to go through few processes & you’re done.
The most frequent problem that an inexperienced user will be facing is when assigning interfaces. Its pretty confusing sometimes when you’re on a physical network or may be on a virtual networking environment. It made me even confusing once (while I was trying to make it available within ESXi as a supporting VM), even though I’m good at networking. You will need to prioritize LAN interface over WAN. Reason is because, when you’ll be prompted to assign interfaces; the process will first prompts to assign WAN interface where you’ll need to label it as second by prioritizing LAN (e.g.: assign em1 to WAN & em0 to LAN).
Alright! Let me come back to the point as what the title describes. I’ve been meddling with pfSense for a while to make it as the primary firewall within our organization. We’re currently managing a Microsoft Forefront TMG which is quiet promising but not as powerful as pfSense. Nevertheless, TMG failed in providing some features that I require. So I made my final decision to change back to an open-source solution. I will not be placing any notes about installation since I’ve already installed pfSense and there are plenty of tutorials that you could google from (send me a request if anyone of you really require a detailed explanation about installation, I’ll consider posting a detailed tutorial)..
Finally!! once done with the installation and of course few configurations, I wanted my Microsoft AD (active directory) to be configured with pfSense. So, that I can either use IPSec, OpenVPN for VPN purpose or any other required work using the AD authentication. There were few articles which helped me but didn’t accomplish what I was trying to do. Simply, I couldn’t get AD authentication issue fixed as it kept on saying unable to connect to the LDAP server. So I finally figured out what was the cause to this problem and just added my AD DNS as the first by following with Google DNS. I cannot be too sure whether assigning the AD DNS had resolved my issue but the time I added, it just started displaying the authentication containers soon after.
Configuring pfSense with Active directory authentication
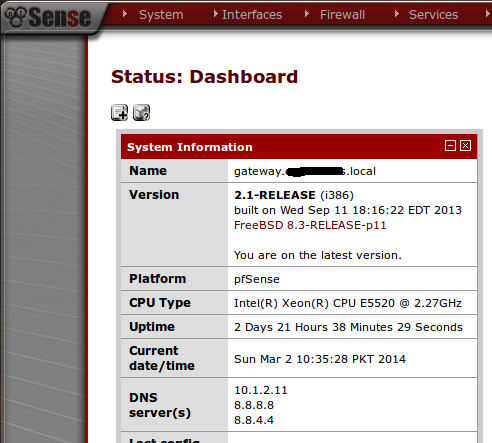
So to speak, I will start the snapshots by adding the AD’s DNS as in first place. This helped to me to get the authentication issue resolved like a charm. (default username is admin & the password is pfsense for a fresh install)
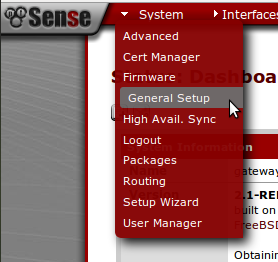
- Log-in to the pfsense web UI then navigate System > General Setup to assign AD DNS (as seen below)
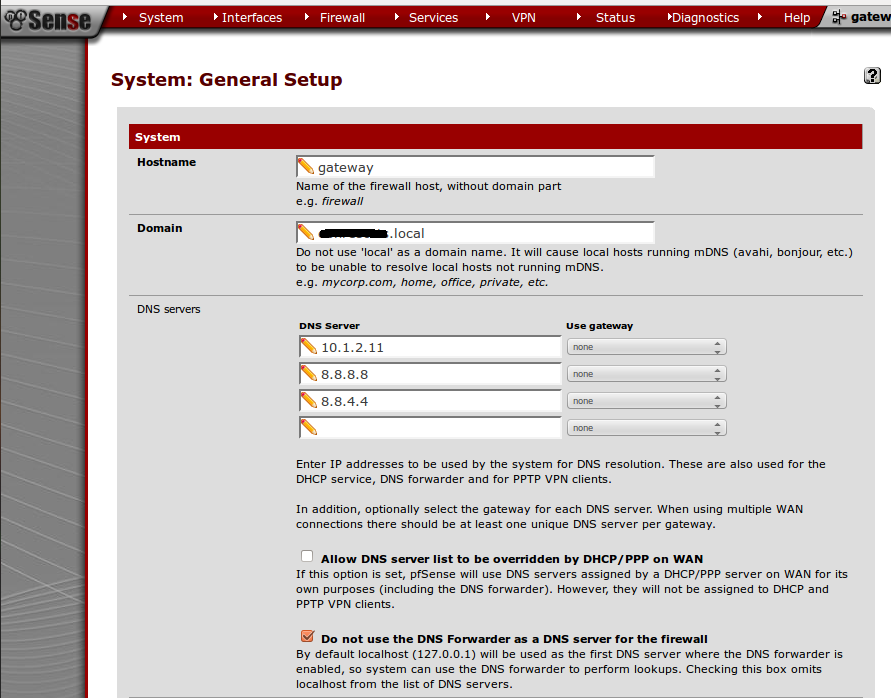
You may select the rest of the option with a tick if you require or you may omit it.
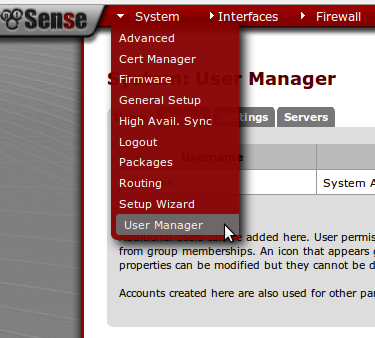
- Once you’re done with the DNS assigning, next is to add the AD DC server to the servers tab in pfsense. To achieve this, navigate to System > User Manager & click on Servers tab.
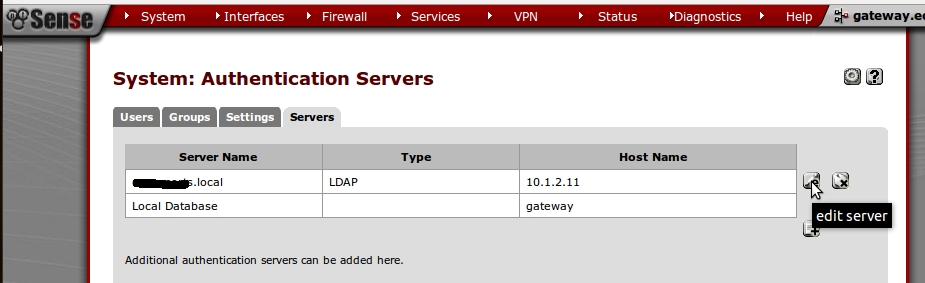
Above screen shows the servers tab where we will add our AD DC server into pfsense for authentication. I’ll be using edit since I’ve already added it to pfsense. You may click on “+” to add you AD DC.
- Below seen is the configuration on the AD which I’ve already added. Explanation will be given below the image;
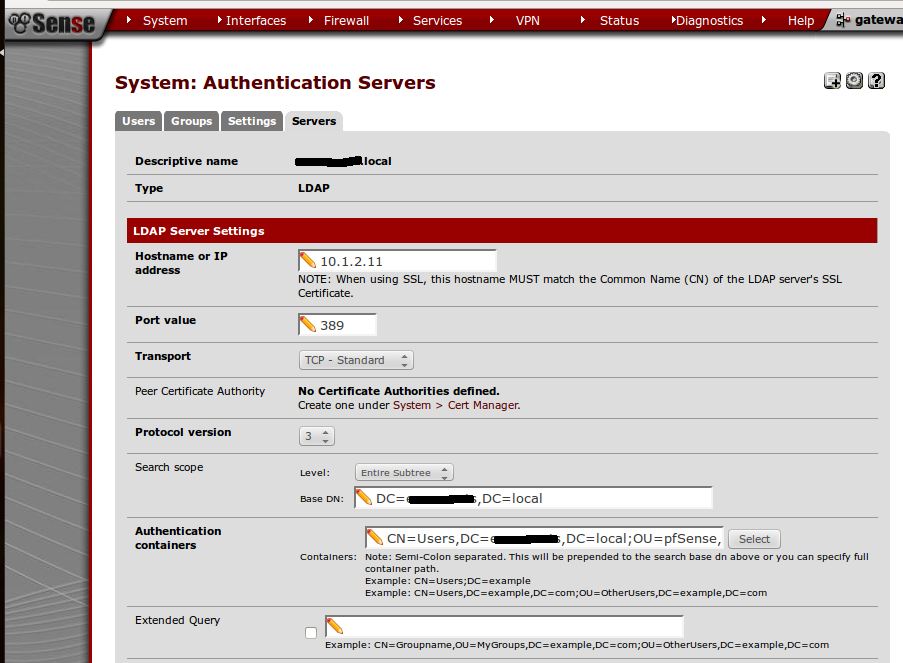
- Descriptive name – You may enter any name as you prefer. I’ve entered my DC FQDN just to identify the AD
- Type – Select LDAP since its an AD authentication
- Hostname or IP address – You may either type the FQDN (fully qualified domain name) or the IP of your AD DC. I’ve just given the IP address in case if the DNS couldn’t resolve any FQDN
- Port value – Let it be as default
- Transport – Default value
- Protocol version – Default value
- Search scope – Select Entire subtree
- Base DN – Type your DC’s containers. Make sure you divide the containers properly (Assuming your domain container is “geeklk.local”. you will have to specify it with two containers as “DC=geeklk,DC=local”)
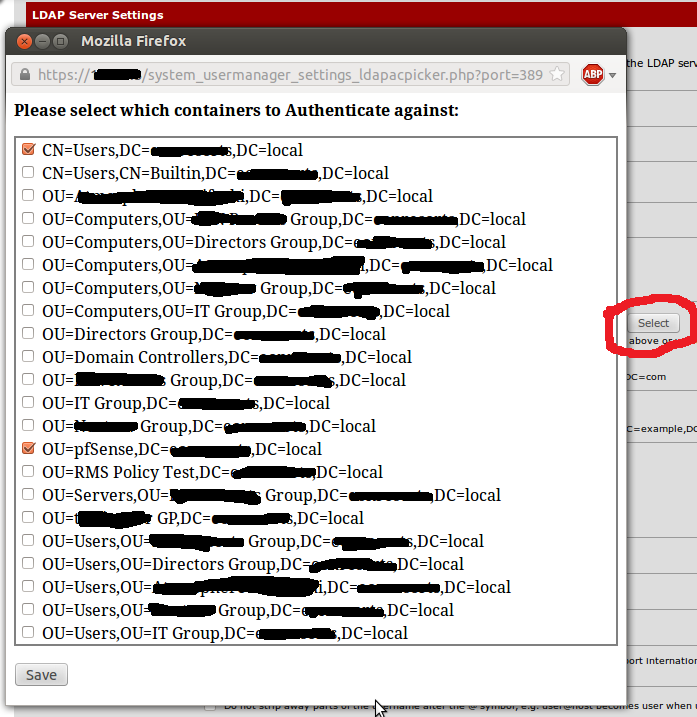
- Authentication Containers – This is where the authentication looks into. Therefore make sure you select or type the containers properly. I’d say use the select button instead. But to use the select button you may need an account with privilege to access the DC.
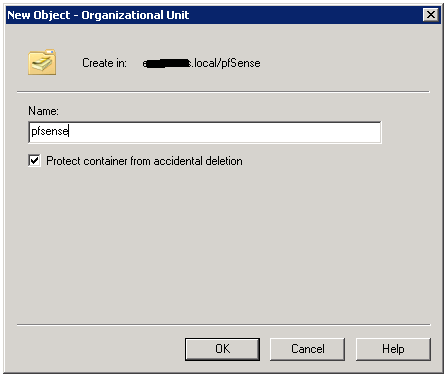
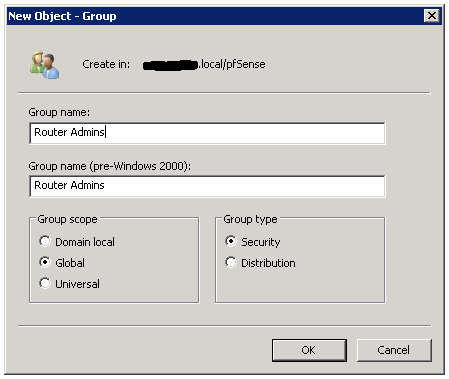
To create an account with such privilege, log-in to your domain controller and create an Organizational Unit; also called an “OU” & a reference use to bind to pfsense by following with a user group to assign privilege. Refer below screen to create an account, and the explanation is added following the image.
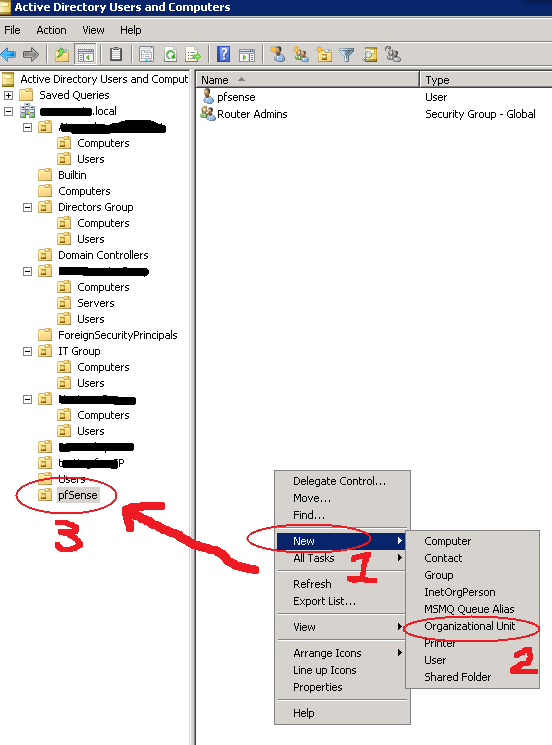
As seen above, I’ve already created an OU & a user named pfsense & also a group naming Router Admins. Below screens explain you how I’ve created the OU, User & Group.

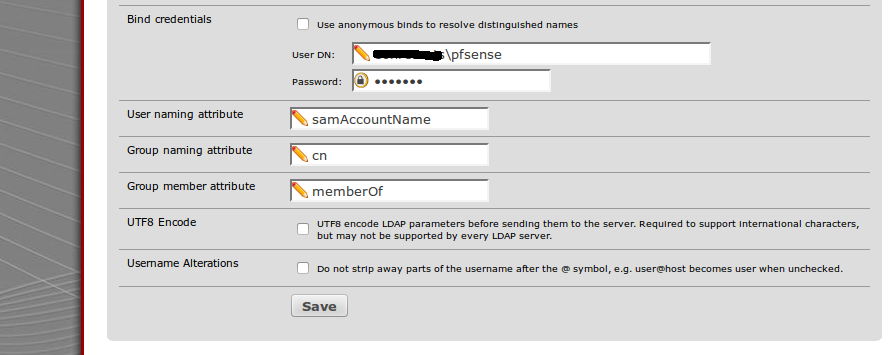
- Once this is set, you may go back to configuring servers where we needed and account to bind in order to pull out all the containers from AD DC. Refer below image to see the account that I’ve bind’ed into the credentials omitting anonymous access.
- As you see below, it will display all the available containers by communicating with the AD DC. You may select the appropriate to go further with the configuration.
- And then save the server configuration. Afterwards, navigate to Groups tab in order to create a group. Make sure you give the group name matching the AD group you’ve created as the same. Refer below;
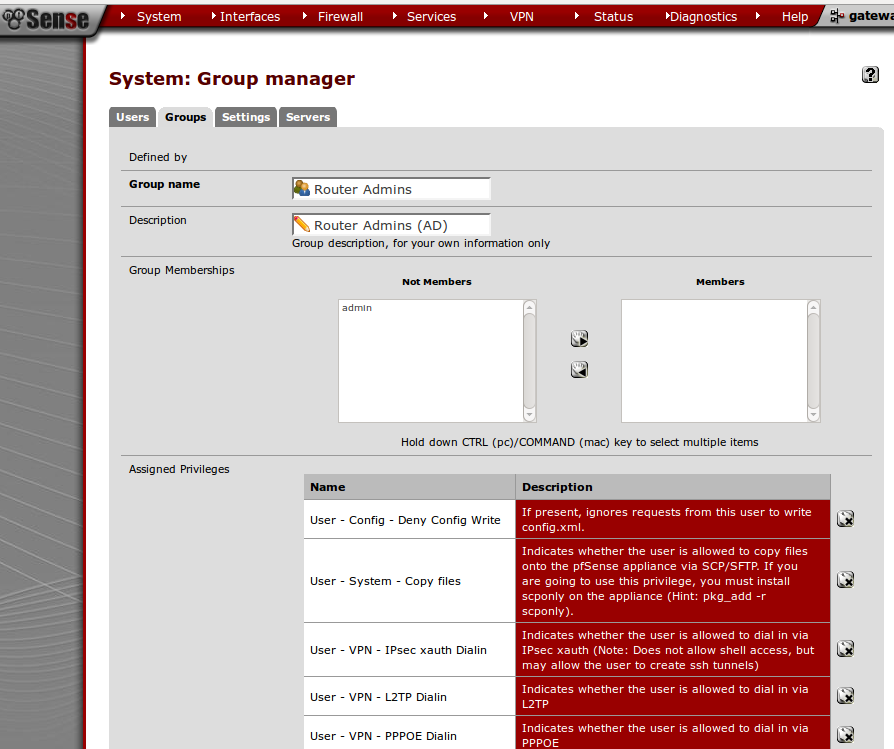
- Also remember you will have to edit the group to assign privilege to the created group. Because, privilege will not show up when creating the group initially.
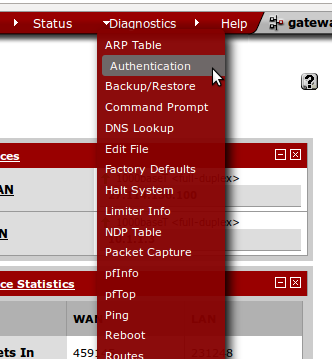
- Once that is done. Our final step is to check whether the AD user authentication is working or not. For that navigate to Diagnostics > Authentication (as seen below)
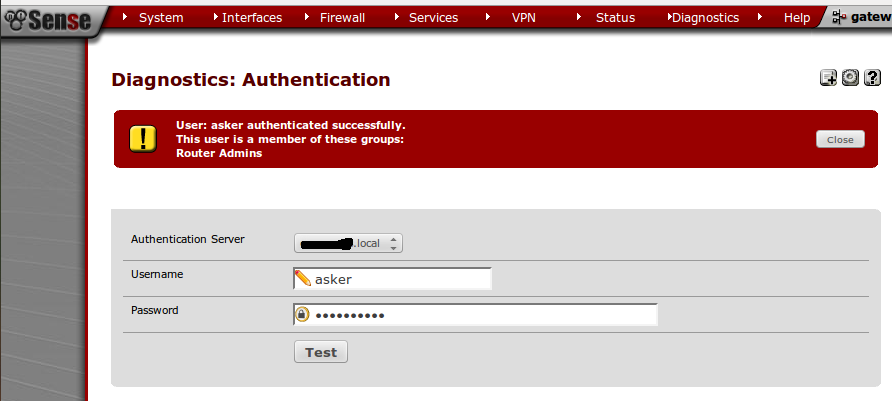
- Key in the user detail to see whether its a success. Now, remember you will have to key in the user who’re within the created group in AD. Else, add them into the group. If its a success you’ll see below screen.
That’s it for the AD Authentication. We’re almost through with the configuration and next is to assign/create VPN access using created LDAP authentication. Now let me figure out whether I’m going to use IPSec or OpenVPN & come back with another fruitful article.
Until then enjoy staying & browsing your favorite articles. ![]()